Turn a single cleaned transcript into 5+ pieces of content—blog outlines, social media threads, video chapters, show notes, and newsletters—without starting from scratch. This guide shows you extraction strategies, formatting patterns, and a one-click workflow using Transcript Cleaner that saves hours of manual content creation.
Table of Contents
Category hub: /creator/captions
Quick Start
- Open the Transcript Cleaner
- Paste your transcript and clean it (remove timestamps, speakers, fillers)
- Read through once; highlight standout quotes and topic shifts
- Create section headers by grouping related ideas (3-7 sections)
- Extract quotable one-liners for social posts
- Add timestamps for video chapters (if using SRT input)
- Export formatted outline to TXT or copy to your content tool
Why Repurpose Your Transcripts
Most creators spend hours writing content from memory after recording a video or podcast. Your transcript already contains all the key points, quotes, and structure—extracting them is 3–5× faster than writing from scratch.
One 20-minute video transcript becomes: a 1,200-word blog post, a 7-tweet thread, 5 video chapters with timestamps, show notes for your newsletter, and 3-5 Instagram carousel slides. Each piece reaches different audiences on different platforms without multiplying your workload.
SEO benefit: search engines index text, not video. A blog post from your transcript means your content appears in search results, driving organic traffic back to your video.
Step 1 — Clean Your Transcript First
Raw transcripts from YouTube, Descript, or Otter.ai include timestamps, speaker labels, fillers, and awkward punctuation. Clean it first—this makes scanning for key moments 10× easier.
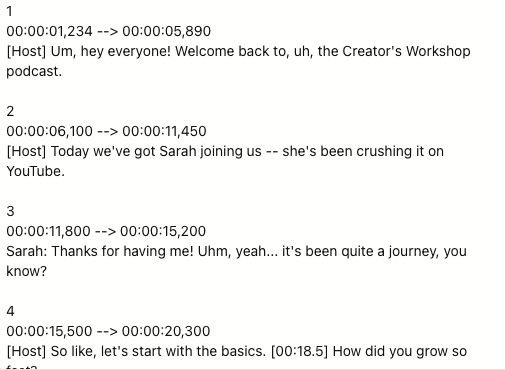
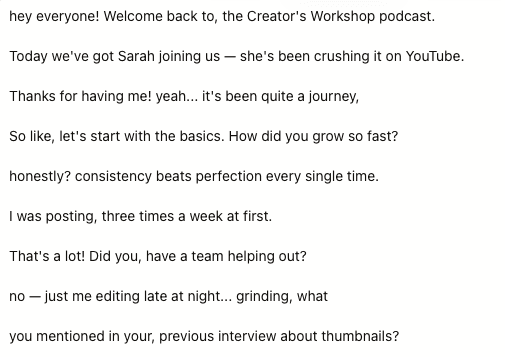
Use the Transcript Cleaner to remove timestamps, speaker labels, and filler words in one click. Enable smart punctuation to fix spacing around ellipses and em dashes.
Pro tip: If you're working with an SRT file and need timestamps later for video chapters, export a second copy without removing timestamps. Keep both versions.
Step 2 — Identify Key Moments and Themes
Read through your cleaned transcript once and mark three things: natural topic shifts (where you change subjects), quotable lines (surprising, specific, or emotional), and examples or stories (these become your social posts and blog callouts).
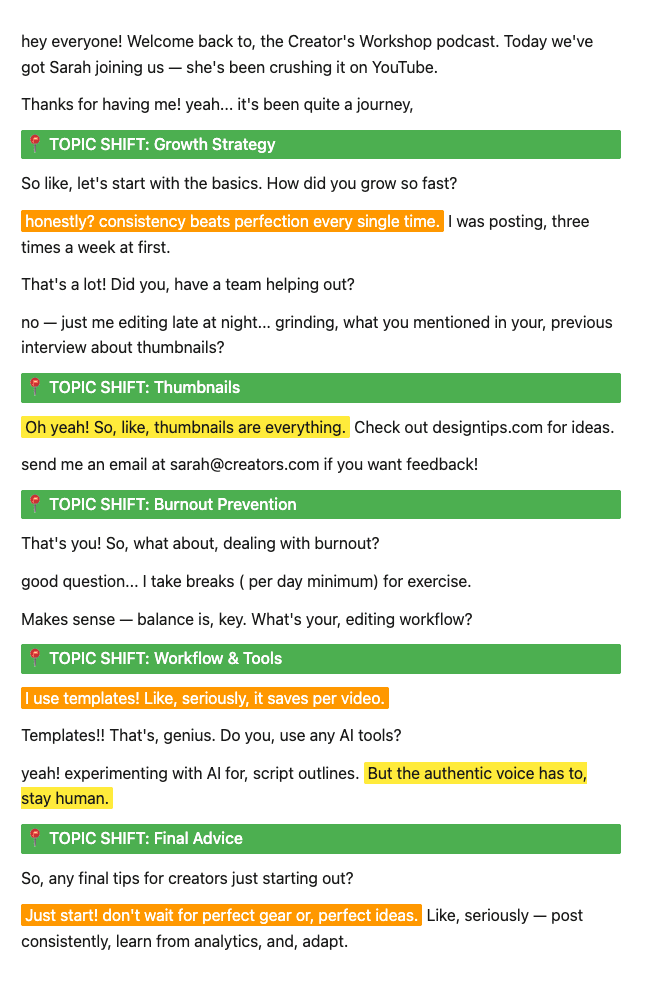
Look for patterns: Problems you identify, solutions you propose, examples or case studies, personal stories, and counterintuitive insights. These become section headers in your blog outline or standalone social posts.
Most 15–20 minute videos naturally break into 3–7 sections. If you see more than 7 major topics, you're likely splitting too fine—group related ideas under broader themes.
Step 3 — Extract Outlines by Content Type
Once you've identified key moments, extract them into platform-specific outlines. Each format serves a different audience and distribution channel.
Blog Post Outline
Structure: Introduction (hook + promise) → 3-5 main sections (each from a topic shift in your transcript) → Conclusion with CTA. Pull direct quotes from your transcript as block quotes or callouts to break up long paragraphs.
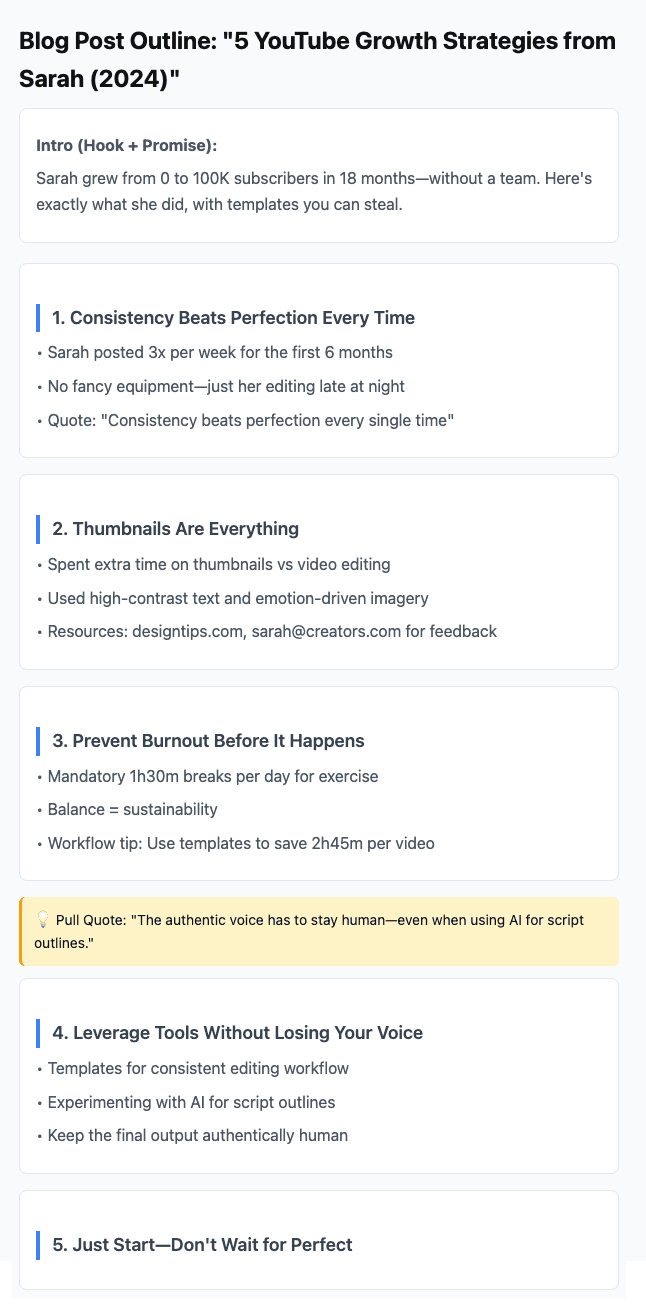
Example template: Title: [From your video title or hook] → Intro: [First 2-3 sentences from transcript + benefit statement] → Section 1: [First major topic + supporting points] → Section 2: [Second topic + example] → Section 3: [Third topic + solution] → Conclusion: [Summary + link back to video].
Video Chapters
Chapters improve retention and let viewers skip to relevant sections. Format: Timestamp + short descriptor (40–60 characters). Aim for one chapter every 2–5 minutes in long-form videos.
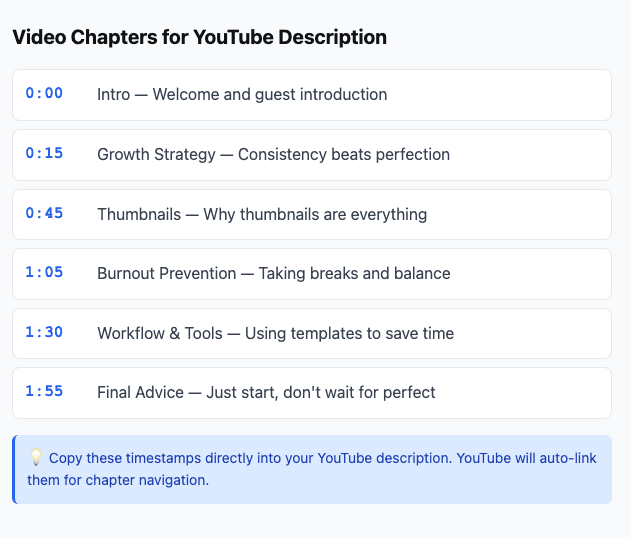
If you kept an SRT version with timestamps, note the timecode where each topic shift occurs. Use the SRT Editor to jump to specific cues and grab exact timestamps. YouTube and most platforms support chapter links in descriptions—format them as 0:00 Intro, 2:15 Problem statement, etc.
Social Media Thread
Hook (from your transcript's opening or a standout quote) + 3–7 tweets/posts expanding on one key idea. Each post should work standalone but build a narrative when read together.
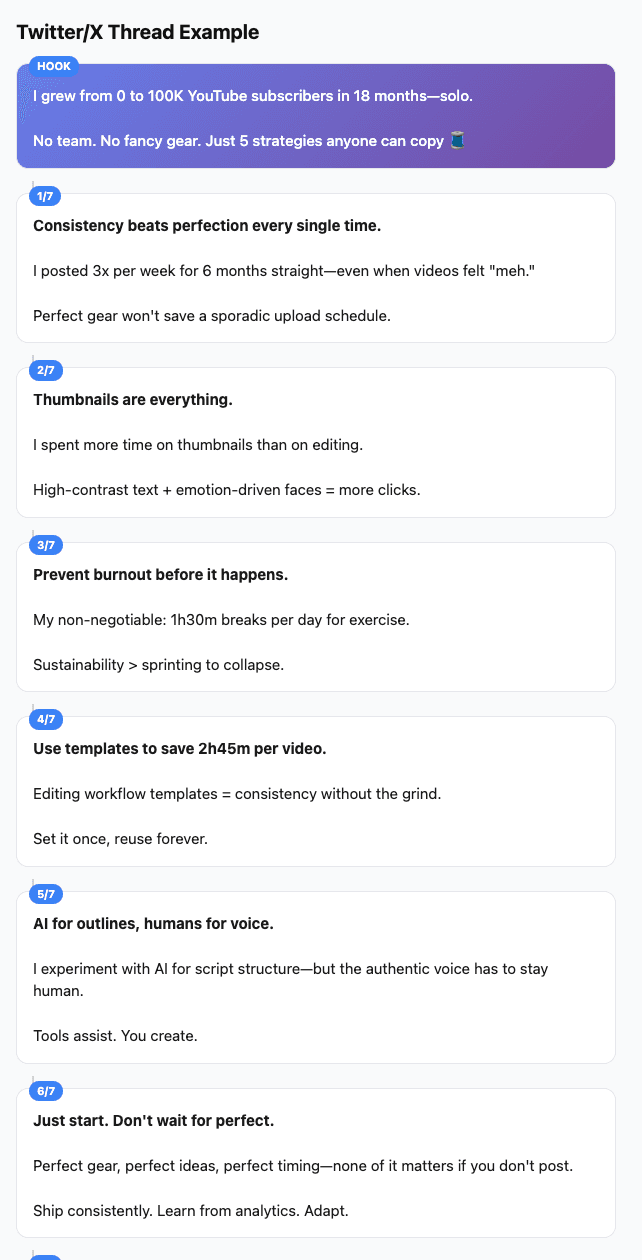
Extract your most engaging quotes—surprising stats, counterintuitive insights, or emotional moments. Add context where needed (spoken language often assumes visual context that text lacks). Link to the Hook Generator to craft platform-optimized hooks from your transcript opening.
Show Notes / Newsletter
Bullet summary (3–5 key points from your transcript) → Quotable lines with attribution → Links to resources or tools mentioned → CTA (subscribe, watch video, book a call).
Format for skimmability: keep bullets under 15 words, use bold for emphasis, and include one featured quote as a pull-out block. Use the Description Builder to structure show notes with reusable blocks and consistent formatting.
Step 4 — Format for Your Target Platform
Each platform has character limits, formatting quirks, and audience expectations. Adjust your extracted outline to fit.
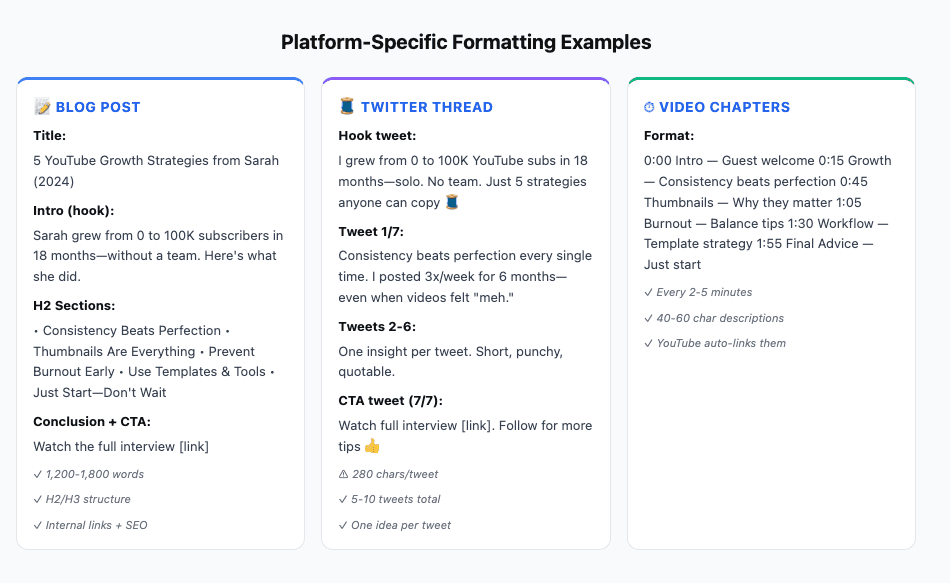
- YouTube descriptions: First 150 characters show in search previews; put your best hook there. Add chapters as timecoded links (0:00 format).
- Twitter/X: 280 characters per tweet. Break long ideas into threads; each tweet should deliver one complete thought.
- LinkedIn: First 2-3 lines visible before "see more" fold. Lead with your strongest insight; save details for below the fold.
- TikTok/Instagram captions: 2,200 character limit but shorter = better. Use line breaks for readability; front-load value.
- Medium/blog platforms: Use H2/H3 headers, short paragraphs (3-4 sentences), and pull quotes to break up text. Link back to your video.
Pro tip: Repurpose from longest to shortest. Start with your blog outline (most detail), then extract the best sections for social threads, then distill the hook for short-form captions.
Common Mistakes & Fixes
- Skipping the clean step → Use Transcript Cleaner first; timestamps and speaker labels break reading flow and make it harder to spot key moments.
- Too many sections → Group related ideas; aim for 3-7 main points. Over-segmenting dilutes your message.
- Copying verbatim → Edit for clarity; spoken language uses filler, repetition, and assumed context that written content doesn't. Tighten sentences.
- Missing timestamps for chapters → Note minute marks during your first read-through. Going back later wastes time.
- Ignoring platform constraints → Check character limits before formatting. A 2,000-word blog outline won't fit in a Twitter thread without heavy editing.
FAQs
- Do I need to clean the transcript before outlining?
- Yes. Timestamps, speaker labels, and fillers make it 10× harder to scan for key moments. Clean first with Transcript Cleaner, then outline.
- How many sections should a blog outline have?
- 3–7 sections for most blog posts. Shorter videos (under 10 minutes) often yield 3-4 sections; longer content (30+ minutes) can support 5-7. More than 7 usually means you're splitting topics too granularly.
- Can I turn one transcript into multiple pieces?
- Absolutely. A single 20-minute video transcript can become: one blog post, one Twitter thread (7 tweets), one LinkedIn post, 5 video chapters, show notes for your newsletter, and 3-5 Instagram carousel slides. Each format targets different audiences.
- What's the best format for video chapters?
- Timestamp + short descriptor (40–60 characters). Format:
0:00 Intro and hook,2:15 Problem statement,5:30 Solution overview. Place them in your video description; YouTube auto-links them. - Should I edit quotes or keep them verbatim?
- Edit for clarity. Spoken language includes filler words, pauses, and assumed context that don't translate well to text. Tighten quotes to their core insight while preserving meaning.
- How do I find the best quotes for social posts?
- Look for surprising statements, specific numbers or examples, counterintuitive insights, and emotional moments. If it made you pause while reading, it'll stop the scroll on social. Use the Hook Generator to refine extracted quotes into hooks.
- Can I use this workflow for podcast transcripts?
- Yes. Podcast transcripts work the same way—clean, identify key moments, extract outlines by format, and publish. For interview podcasts with multiple speakers, use the "Remove speakers" option in Transcript Cleaner to create a flowing narrative, or keep speakers intact for Q&A-style show notes.