Most creators change titles on instinct, hoping a new headline boosts CTR. That resets momentum, muddies your analytics, and wastes upload velocity. This guide shows you how to run statistically valid title tests without touching the live video—using tracking links, proper logging, and confidence thresholds you can trust.
Table of Contents
Category hub: /creator/social
Quick Start
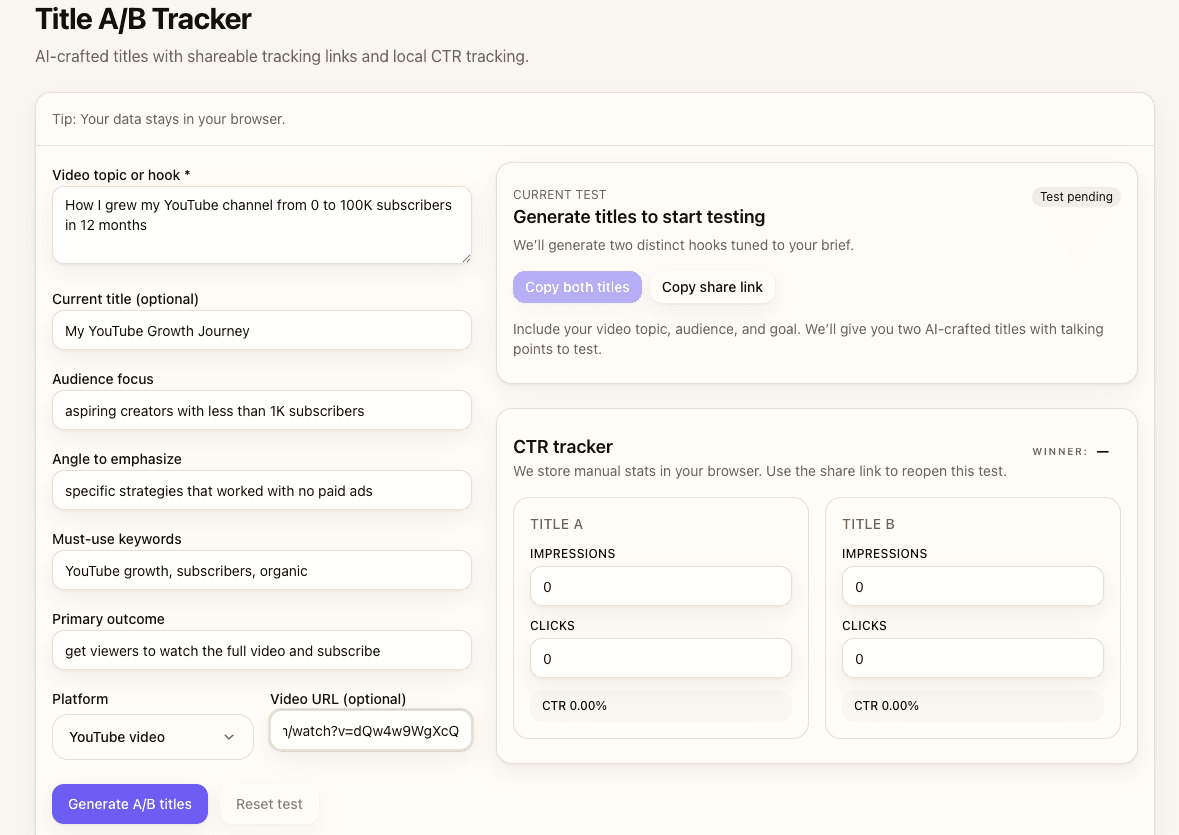
- Open the Title A/B Tracker and describe your video topic, audience, and goal.
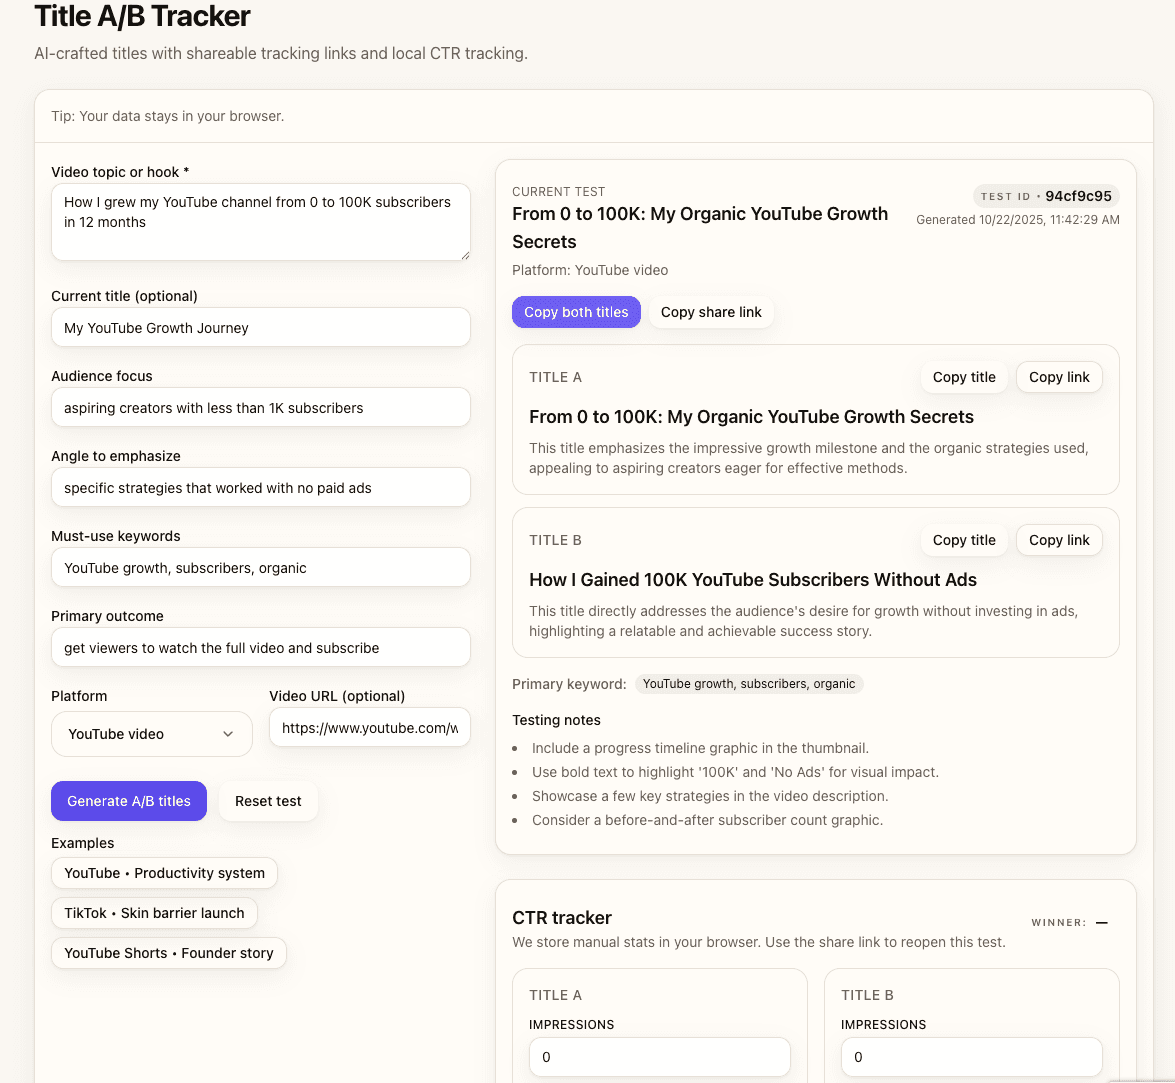
- Click "Generate A/B titles" to create two variants with different angles.
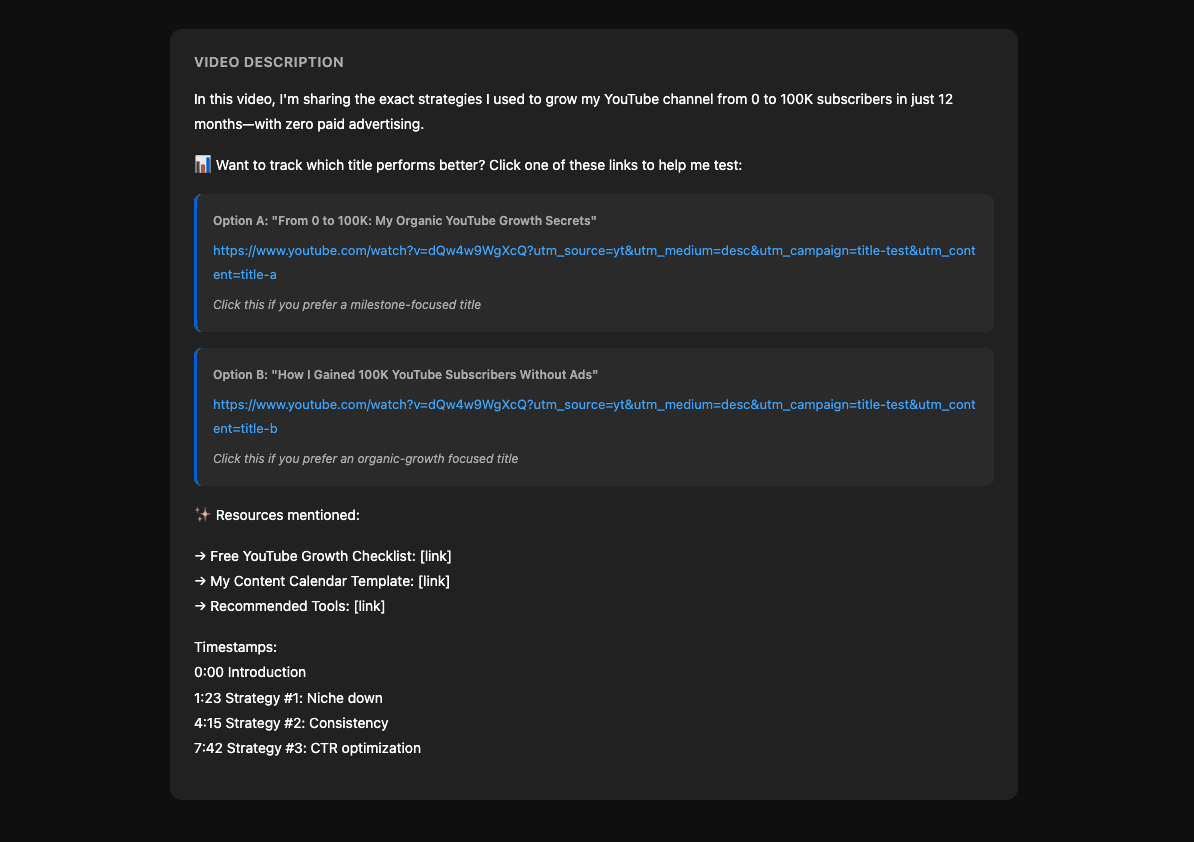
- Copy the tracking links and paste them into your video description or pinned comment.
- Wait 48–72 hours; log impressions and clicks from YouTube Studio analytics into the tracker.
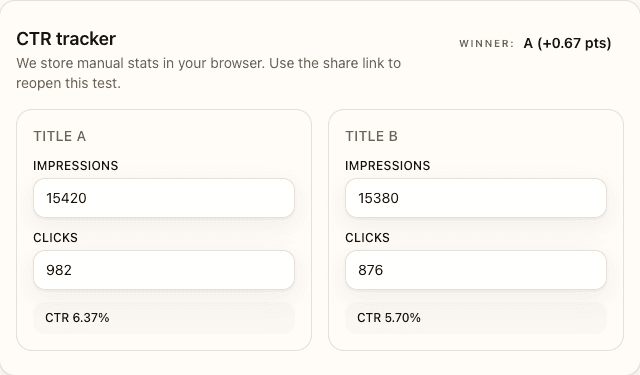
- Use the built-in CTR calculator to confirm the statistical winner.
Why Most Title Tests Fail
Creators often swap titles after 24 hours, see an early spike, and declare victory—without realizing upload velocity, time zones, and subscriber notifications skew the first-day numbers. Real CTR settles over 48–72 hours, once the algorithm stops front-loading traffic and impressions stabilize across the feed.
Other common problems: vague hypotheses ("which title is better?"), tiny sample sizes (fewer than 50 clicks per variant), and confirmation bias (cherry-picking metrics to match gut instinct). The fix is structured tests with clear tracking links, patient data collection, and statistical rigor.
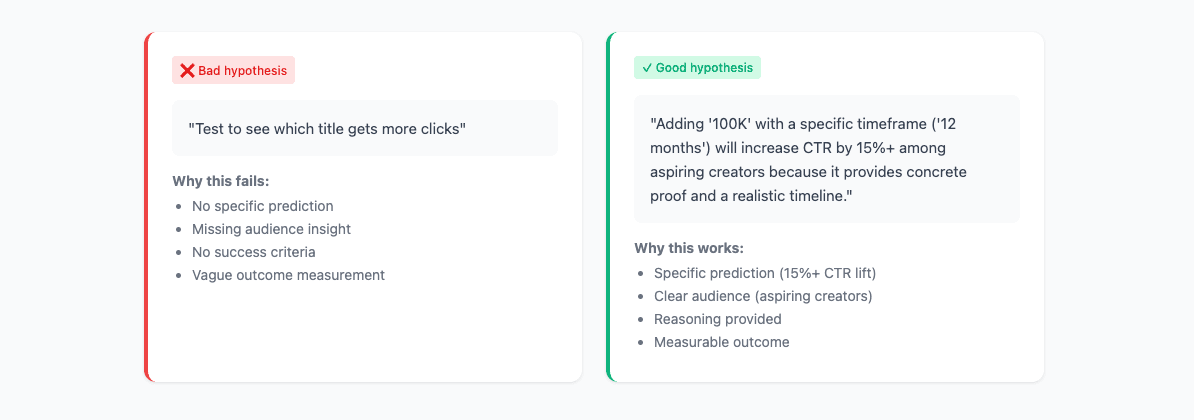
Step 1 — Define Your Hypothesis
Every test needs a clear prediction. Instead of "which title gets more clicks," frame it as: "Adding a time frame will increase CTR by 15%+" or "Curiosity-led headlines will outperform benefit-led ones for this audience."
That forces you to test meaningful differences: curiosity vs clarity, specific numbers vs emotion, short (40 chars) vs medium (55 chars). Avoid synonym swaps like "Best" vs "Top"—those rarely produce actionable insights.
Avoid vague tests
A vague test like "Does Title A or Title B work better?" teaches you nothing when you lose. A strong hypothesis tells you exactly what signal to look for, win or lose, so you can apply the lesson to future videos.
Step 2 — Generate Two Strong Variants
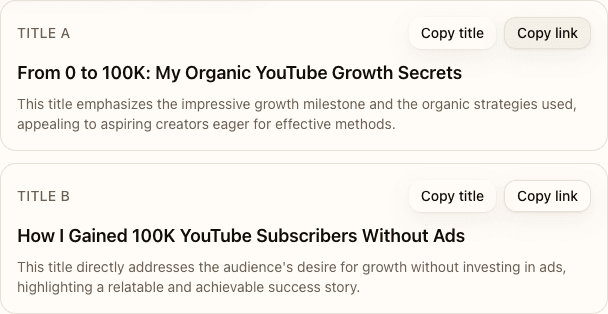
Use the Title A/B Tracker's AI generation to produce two titles with distinct angles. Fill in your topic, audience, and angle—the more specific you are, the sharper the variants. Aim for meaningful differences, not just synonym swaps or word order changes.
Keep the first 45 characters strong, since mobile feeds truncate unpredictably. If your payoff or key promise appears after character 50, most viewers will never see it.
Step 3 — Set Up Tracking Links Correctly
Tracking links are native YouTube URLs with UTM parameters appended—no redirects, no external landing pages. YouTube ignores UTM tags for recommendations, so these links won't hurt your video's performance. You'll monitor total impressions in YouTube Studio, then log clicks per link manually to calculate CTR.
Where to place tracking links
- Pinned comment: Best visibility; viewers often check comments for context or timestamps.
- Top of description: Shows in the first 2–3 lines before "Show more."
- Community post: Ideal for testing before the video goes live or for existing videos with steady traffic.
Step 4 — Run the Test (Duration & Sample Size)
Run tests for 48–72 hours minimum. The first 24 hours favor subscribers and notifications; days 2–3 reflect organic feed traffic. If your video gets steady impressions, wait the full 72 hours. If traffic is slow, extend to 7 days or test on a higher-performing video next time.
Sample size guidelines
Aim for 100+ clicks per variant as a practical floor; 300+ gives you stronger confidence. Fewer than 50 clicks per title means you're measuring noise, not signal. If your video gets fewer than 200 total clicks in 72 hours, consider testing on a community post or waiting for a video with more traction.

Step 5 — Log Data and Pick the Winner
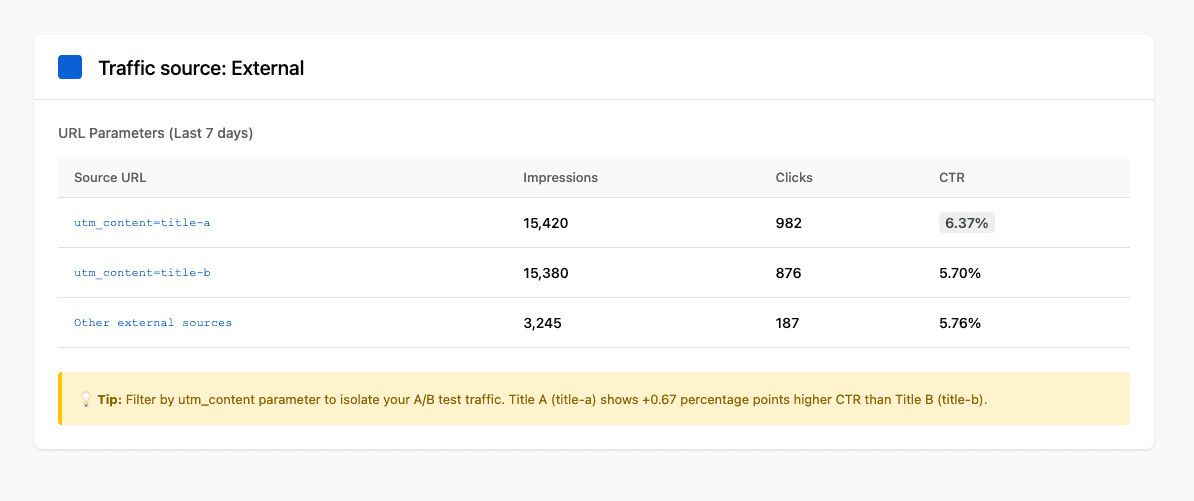
After 48–72 hours, open YouTube Studio, navigate to the Analytics → Reach tab, and note total impressions and clicks for the video. YouTube doesn't split metrics by tracking link, so you'll log clicks per link manually by checking your analytics or using a URL shortener dashboard if you set one up externally.
Enter impressions (split evenly or weighted by link placement) and clicks into the Title A/B Tracker. The tool calculates CTR for each variant and shows the winner with statistical confidence. Look for >95% confidence or >2% absolute CTR difference before declaring a winner.
Statistical Validity: When Results Matter
A 1% CTR difference on 50 clicks is noise. A 3% difference on 300 clicks is signal. The confidence interval tells you how much variance to expect if you repeated the test. Aim for >95% confidence or >2% absolute CTR lift before calling a winner.
When to call it
- >95% confidence: The difference is unlikely to be random chance.
- >2% absolute CTR difference: A practical threshold for real-world impact (e.g., 6% vs 8%).
- 100+ clicks per variant: Minimum sample to trust the numbers; 300+ is better.
What to do when results are inconclusive
If neither title wins after 7 days or 300+ clicks, the problem likely isn't the title—it's the thumbnail, hook, or audience targeting. Test thumbnail-title pairings next, or revisit your video concept with the Hook Generator and Shorts Clip Finder.
Common Mistakes & Fixes
- Changing title after 24 hours → Wait 48-72 hours for stable data; early velocity isn't final CTR.
- Testing on videos with <1,000 impressions → Run tests on videos that get consistent traffic or use community posts.
- Not logging impressions separately → YouTube doesn't split by link; you need to track total impressions and estimate distribution.
- Making titles too similar → Test distinct angles (curiosity vs benefit, short vs specific) for clearer signals.
- Ignoring thumbnail alignment → Mismatched title/thumbnail kills CTR; test as a pair.
FAQs
- How long should I run an A/B test?
- Minimum 48–72 hours. Aim for 100+ clicks per variant or 7 days max, whichever comes first.
- Can I change the title after I publish?
- Yes, but changing the public title resets momentum. Use tracking links to test without editing the live title.
- What sample size do I need for valid results?
- 100+ clicks per variant is a practical floor; 300+ gives you stronger confidence. Fewer than 50 is noise.
- Should I test on new videos or existing ones?
- Both work. New videos let you test launch velocity; existing videos with steady traffic give cleaner ongoing CTR.
- What if both titles perform poorly?
- Test your thumbnail next or revisit your hook. Low CTR often signals weak thumbnail-title pairing, not just title.
- Do tracking links affect YouTube's algorithm?
- No. They're native YouTube URLs with UTM parameters; YouTube ignores UTMs for recommendations.
- Can I run multiple tests at the same time?
- Yes, but test one variable per video (title only, not title + thumbnail). Run tests on different videos for parallel learning.