For content creators on YouTube, TikTok, or Instagram, large video files slow down your workflow and delay uploads. This guide provides the exact settings, commands, and platform-specific workflows to reduce video file sizes—like turning a 1GB 4K file into a crisp 250MB 1080p version—without visible quality loss. The outcome is a faster, more efficient content delivery pipeline, cutting upload times from an hour to under 15 minutes.
Explore all guides in the Video Creator Hub →
Table of Contents
- Quick Start: The 5-Step Compression Workflow
- Understanding the Core Components of Video File Size
- Method 1: Compressing Video Files with HandBrake
- Method 2: Using FFmpeg for Automated Compression
- Platform-Specific Optimization: YouTube, Instagram, & TikTok
- Common Mistakes & Fixes
- Frequently Asked Questions
Quick Start: The 5-Step Compression Workflow
- Select Your Tool: Use HandBrake for a visual interface or FFmpeg for command-line automation.
- Choose Codec & Resolution: Set the video codec to H.264 (libx264) for maximum compatibility. Downscale to 1080p (1920x1080 or 1080x1920) for social media.
- Set Quality/Bitrate: Use a Constant Rate Factor (CRF) between 21-24. This adjusts the bitrate to maintain consistent visual quality.
- Optimize Audio: Set the audio codec to AAC with a bitrate of 128 kbps. Higher bitrates offer no audible benefit for web content.
- Export & Verify: Run the export and check a few seconds of the output file to confirm quality before uploading.
Understanding the Core Components of Video File Size
To reduce a video's file size effectively, you must understand what contributes to it. A video file is a container holding multiple data streams—primarily video and audio. The size is determined by four key factors: bitrate, resolution, frame rate, and the codec.
Figure 1: The primary settings—codec, bitrate, and resolution—directly control the final output file size.
Codecs and Containers Explained
A codec (coder-decoder) is the algorithm that compresses and decompresses video data. The container (e.g., .MP4, .MOV) is the wrapper that holds these streams together. Your choice of codec has the largest impact on file size.
The H.264 (AVC) codec is the industry standard for web video due to its universal compatibility. Its successor, H.265 (HEVC), offers superior efficiency, reducing file size by an additional 40-50% at the same visual quality, but it has less widespread hardware support.
Decision Framework: H.264 vs. H.265
- Use H.264 for: Maximum compatibility across all platforms (YouTube, Instagram, TikTok). It is the safest choice for social media delivery.
- Use H.265 for: Archiving 4K masters or delivering video where you control the playback environment. Its efficiency is ideal for minimizing storage costs.
How Bitrate, Resolution, and Frame Rate Affect Size
These three parameters directly multiply the amount of data in your file.
- Bitrate: The amount of data per second of video, measured in megabits per second (Mbps). It is the single most significant factor in file size. A 10 Mbps file is twice as large as a 5 Mbps file of the same length.
- Resolution: The number of pixels in each frame. A 4K video (3840x2160) contains four times the pixel data of a 1080p video (1920x1080), resulting in a file roughly four times larger, all else being equal.
- Frame Rate: The number of frames displayed per second (fps). A 60 fps video contains twice the data of a 30 fps video, effectively doubling its size. Dropping from 60 fps to 30 fps is a quick way to cut file size by nearly 50%.
Method 1: Compressing Video Files with HandBrake
HandBrake is a free, open-source video transcoder that provides granular control over compression. It is ideal for creators who need a visual interface to fine-tune settings for specific platforms.
Figure 2: HandBrake's interface allows for detailed adjustments to video and audio settings after selecting a starting preset.
A Practical HandBrake Workflow
- Open your source video in HandBrake.
- In the Preset dropdown, navigate to
Generaland select Fast 1080p30. This provides a reliable baseline for web video. - Go to the Video tab. Ensure the Video Codec is set to
H.264 (x264). - Adjust the Constant Quality slider. This setting, measured by Rate Factor (RF), is more efficient than a fixed bitrate.
- For web content (YouTube, Instagram): An RF value between 21-24 provides an optimal balance, creating a file visually similar to the original at a fraction of the size.
- Navigate to the Audio tab.
- Set the Codec to
AAC. - Set the Bitrate to
128. Anything higher provides no audible benefit on social platforms and adds unnecessary size.
- Set the Codec to
Real-World Example: I processed a 2-minute, 4K (3840x2160) ProRes file that was 4.2 GB. Using the HandBrake workflow above with an RF of 22 and scaling to 1080p, the final H.264 file was 185 MB—a 95.6% reduction in size with no perceptible loss of quality for a YouTube upload.
Understanding how to apply these principles is crucial, especially when handling specific formats. For a detailed guide on Apple's format, see our article on how to compress MOV files without losing quality using these exact methods.
Method 2: Using FFmpeg for Automated Compression
For creators who need to process videos in bulk or integrate compression into a script, FFmpeg is the definitive command-line tool. It offers precise, repeatable control over every encoding parameter.
Core FFmpeg Commands for File Size Reduction
FFmpeg's power lies in its flags. The most important for quality-based compression is -crf (Constant Rate Factor), which functions identically to HandBrake's RF slider. A lower value (e.g., 18) means higher quality and larger files; a higher value (e.g., 28) means lower quality and smaller files.
Use these copy-ready commands for common creator tasks:
- Basic H.264 Re-encode with CRF: This command converts
input.movtooutput.mp4using a CRF of 23, which is an excellent baseline for web video. The-preset veryfastflag ensures a quick encoding time.ffmpeg -i input.mov -c:v libx264 -preset veryfast -crf 23 -c:a aac -b:a 128k output.mp4 - Downscale to 1080p: The
-vf scalefilter resizes a video. Using-2:1080automatically calculates the width to maintain the aspect ratio while setting the height to 1080 pixels.ffmpeg -i input_4k.mp4 -vf scale=-2:1080 -c:v libx264 -crf 22 output_1080p.mp4 - Create a Vertical 9:16 Clip for Social Media: This command crops a 16:9 video to a 9:16 aspect ratio, resizes it to 1080x1920, and applies efficient compression. This is perfect for turning YouTube content into Instagram Reels or TikTok videos.
ffmpeg -i input_16x9.mp4 -vf "crop=ih*9/16:ih,scale=1080:-2" -c:v libx264 -crf 24 output_9x16.mp4
For more advanced cropping and resizing workflows, our guide to convert 16:9 to 9:16 using FFmpeg provides additional commands.
Real-World Example: A client needed to convert 25 horizontal product videos for Instagram Stories. Manually editing each one would have taken hours. Using a batch script with the FFmpeg 9:16 command, I processed the entire folder in under 30 minutes. The total folder size was reduced from 12.4 GB to 1.9 GB.
Platform-Specific Optimization: YouTube, Instagram, & TikTok
Uploading the same file to every platform degrades quality. Each service uses its own compression algorithms. Your goal is to provide a file optimized for each specific platform to survive its re-encoding process.
YouTube Upload Specifications
YouTube has a sophisticated encoding pipeline that benefits from high-quality source files. Do not over-compress your video before uploading.
- Resolution: Upload at your native editing resolution (e.g., 4K or 1080p).
- Codec: H.264 (AVC) or Apple ProRes 422.
- Bitrate (H.264):
- 1080p @ 30fps: 12-15 Mbps
- 4K @ 30fps: 40-60 Mbps
- Audio: AAC codec at 384 kbps.
Feeding YouTube a high-bitrate master file allows it to generate high-quality VP9 transcodes, which results in better viewing experiences for your audience.
Instagram & TikTok Export Specifications
Instagram and TikTok prioritize fast loading on mobile devices and will aggressively compress your video. Your goal is to upload a file that is small enough for quick processing but retains enough quality to withstand their compression.
- Resolution: 1080x1920 (vertical). Uploading in 4K is unnecessary and often results in poorer quality after downscaling.
- Codec: H.264 (AVC) in an .MP4 container.
- Bitrate: Variable Bitrate (VBR) at 8-12 Mbps.
- Audio: AAC codec at 128 kbps.
For detailed specifications, consult our guides on the Instagram video aspect ratio and complete guide to TikTok video ad specifications.
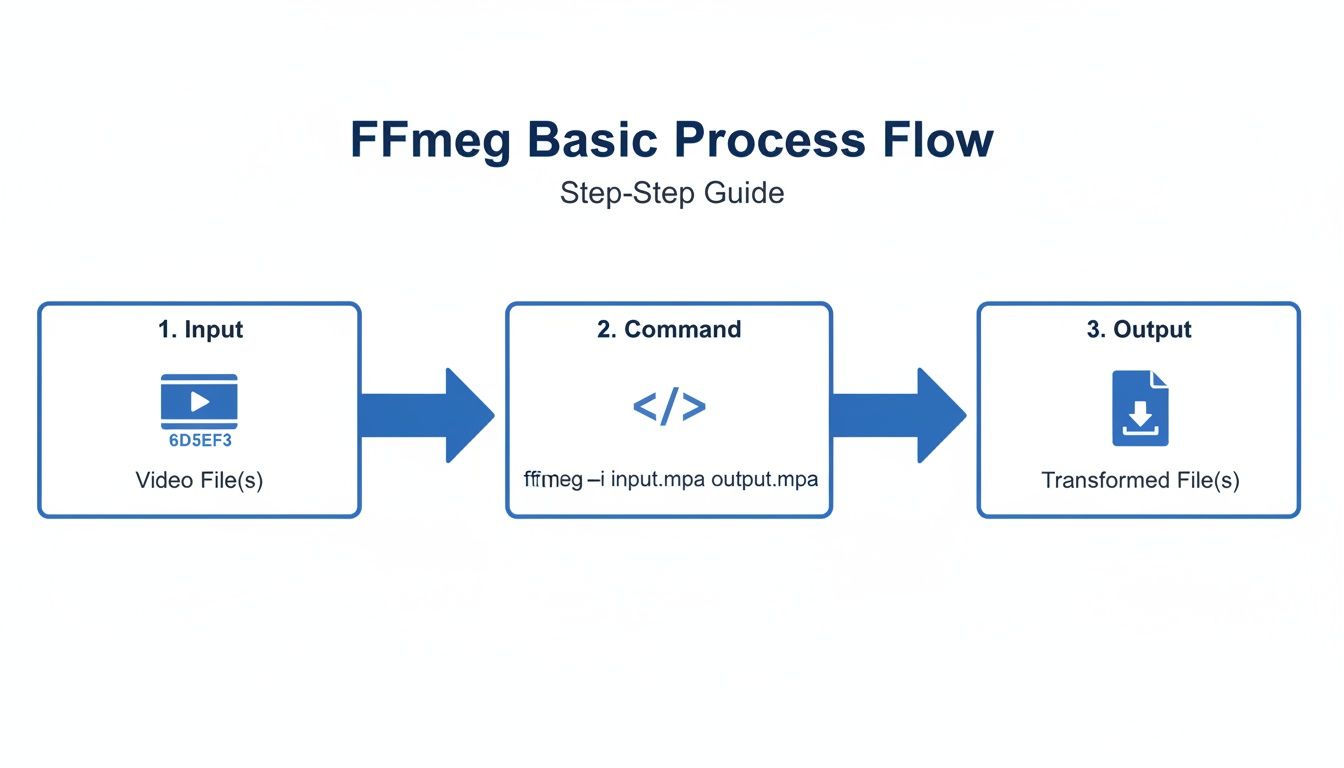
Figure 3: The FFmpeg workflow simplifies batch processing into three distinct stages: input source, command-line processing, and optimized output.
Common Mistakes & Fixes
Avoid these common errors to ensure your compressed videos maintain high quality.
- Issue → Over-compressing before uploading to YouTube.
- Fix: Export a high-bitrate master file for YouTube (e.g., 45-60 Mbps for 4K). Let its encoders handle the final compression. Providing a quality source file results in a better final product.
- Issue → Using one-size-fits-all export settings.
- Issue → Choosing Constant Bitrate (CBR) instead of VBR or CRF.
- Fix: Always use a quality-based setting like CRF (in FFmpeg/HandBrake) or 2-pass VBR. These methods allocate data more intelligently, improving quality and reducing file size compared to CBR.
- Issue → Re-compressing an already compressed file.
- Fix: Perform all edits on your original, high-quality source footage. Apply compression only once, as the final step before uploading. Each compression cycle discards data permanently.
Frequently Asked Questions
What is the best bitrate for a 1080p video?
For a 1080p video at 30 fps, a bitrate of 8-12 Mbps is ideal for social platforms like Instagram and TikTok. For YouTube, use a higher bitrate of 12-15 Mbps to provide their encoder with a better source file.
Does compressing audio save significant space?
Yes. A 10-minute video with 320 kbps audio uses approximately 24 MB for the audio track alone. Reducing the audio bitrate to 128 kbps—which is transparent for web use—cuts the audio data down to 9.6 MB, saving over 14 MB with no audible quality loss.
Should I shoot in 4K for social media if I only deliver in 1080p?
Yes. Shooting in 4K provides significant flexibility in post-production. It allows you to crop, reframe, and punch in on shots without losing sharpness, which is essential for creating vertical 9:16 cutdowns from horizontal 16:9 footage. My workflow is to shoot in 4K and export platform-specific 1080p files.
Which matters more for file size: length or resolution?
Bitrate matters most. File size is calculated as (bitrate in Mbps / 8) * video length in seconds. A 1-minute 4K video at 10 Mbps will be the same size as a 1-minute 1080p video at 10 Mbps. However, a 4K video requires a much higher bitrate (e.g., 40 Mbps) to look as clear as a 1080p video at 10 Mbps.
When should I use H.265 (HEVC) instead of H.264?
Use H.265 when file size is the absolute priority and you can ensure your audience has modern devices for playback. It reduces file size by about 40% compared to H.264. Stick with H.264 for maximum compatibility, as it is the universally supported standard for web and social media platforms.